

How To Draw A Face With Pencil For Beginners
How to Draw a Confront for Beginners
At that place are many unlike ways to learn how to depict a face. The approach you'll be learning today is a simplified technique designed to go you lot started.
There is a lot that goes into cartoon faces. Especially if you're trying to get a good likeness of the person. Only we'll save that for a later lesson.
The process is the same regardless of what type of person y'all are cartoon. Immature or quondam, man or woman. The technique will e'er be the same.
* Some of the links in this postal service may be affiliate links. This ways I receive small commissions for purchases made through these links at no extra cost to you.
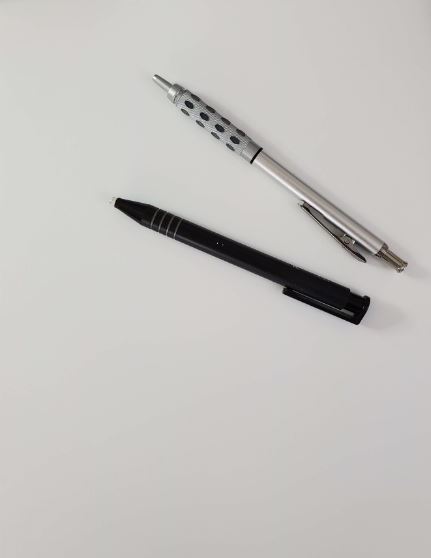
Art Supplies
Paper or cardstock
Pencil
Blending stump
Eraser
Reference photo (unsplash)
How to Draw a Face
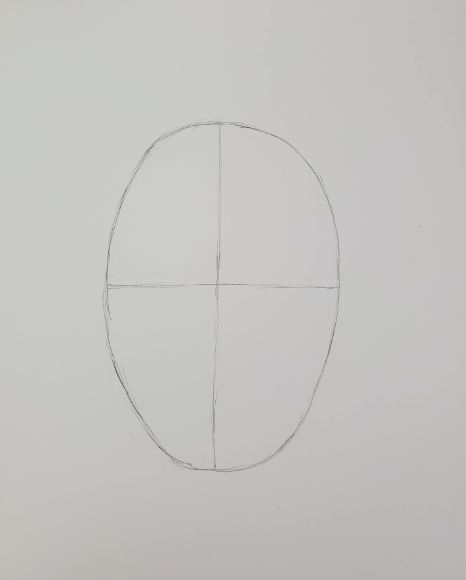
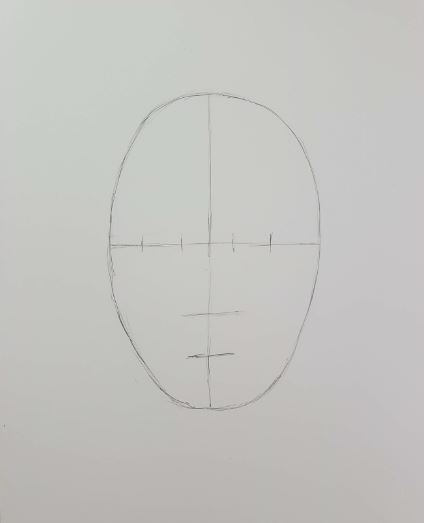
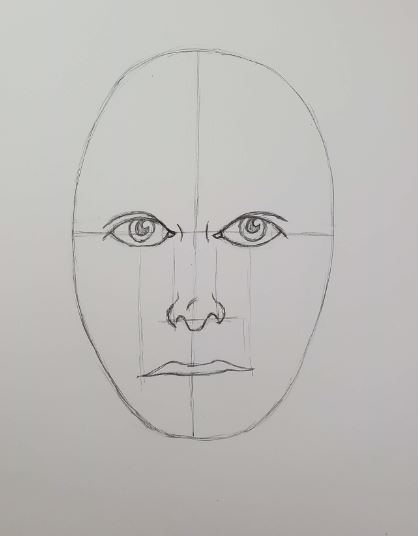
To begin cartoon a face, you'll first need to layout some guidelines. Draw an oval that is roughly the same size as you desire your final drawing to be.

This is the overall shape of the head.
Next, divide the face up downward the center and beyond the centre. These will be your guidelines for placement and symmetry.
The line going beyond the middle (horizontally) volition be where you volition draw your optics. Make another, shorter, horizontal line halfway between in that location and the bottom of your oval.
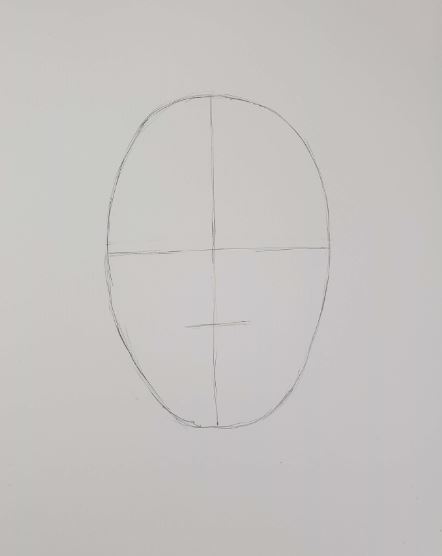
This is where you'll draw the nose.
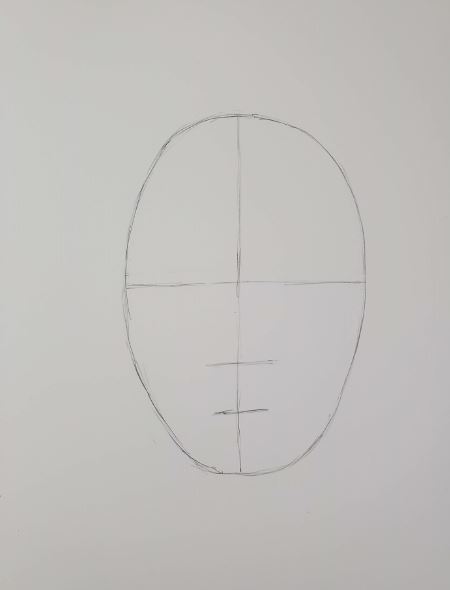
And and then once more halfway between the line for your olfactory organ and the lesser of the oval. This line is for the rima oris.
These are some full general rules to get you started on cartoon faces. Anybody looks unlike, so there really isn't any ane way to draw a face.
But this drawing lesson will show you how to draw a confront, one fashion. There are many different approaches. Some like shooting fish in a barrel, and some much more complex.
Information technology'south easiest if you use some kind of reference photo. All the same, if yous are just learning how to draw faces don't worry besides much about trying to capture the likeness.
That comes later.
Let's start drawing in the features of the face past drawing the eyes.
Get Your Free Face Cartoon Guide
Cartoon Optics
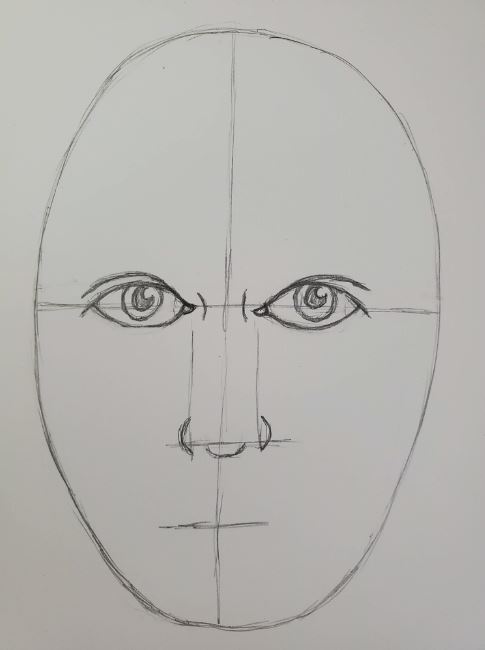
To draw the eyes, begin by adding some additional guidelines. You want your eyes to be fairly close to the same size, and the space betwixt the eyes to match the size of your eyes.
If you lot actually expect at someone's eyes, they are non perfectly symmetrical. So don't stress out too much if they're not exact.
You tin crude in your eyes with almond shapes to get the size and placement right.
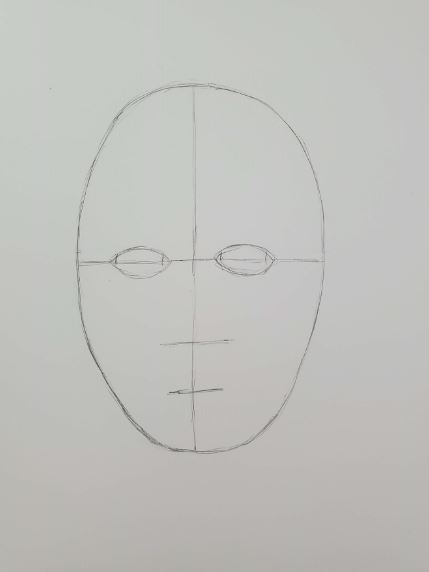
When you are satisfied with the size and placement of the eyes, commencement adding in the extra details.
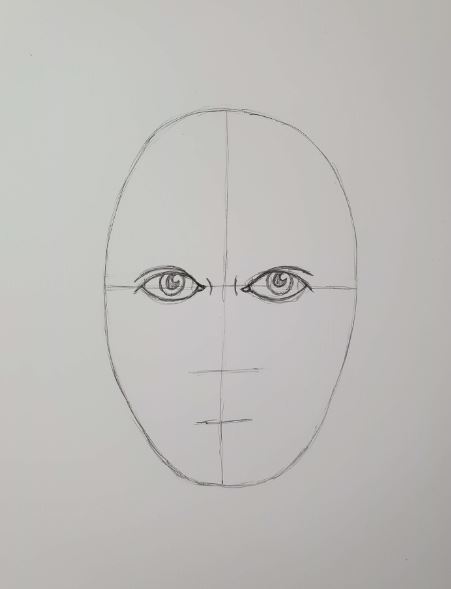
We have a full tutorial on drawing eyes if you lot need more help with the eyes.
We'll move onto the nose adjacent.
Drawing a Nose
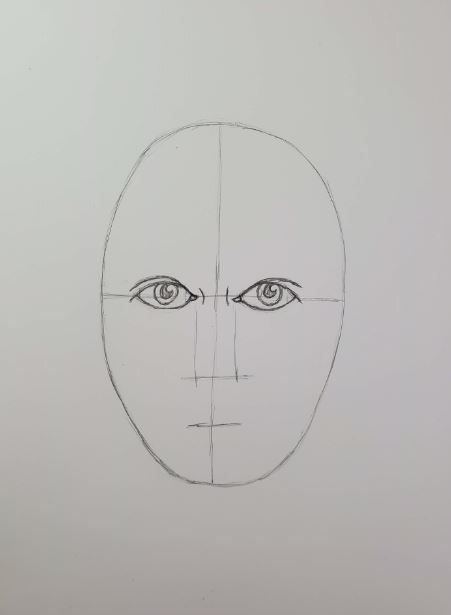
The width of the nose should be roughly equal to the space between the optics. Most of the nose, when cartoon a face, is created with shading.
In life, we don't have harsh lines all over our faces. However when cartoon a confront, it's incommunicable to avoid using lines altogether.
For this lesson you lot'll learn to apply a combination of lines and shading. The more comfortable you get with drawing faces, the less you'll demand to describe lines.
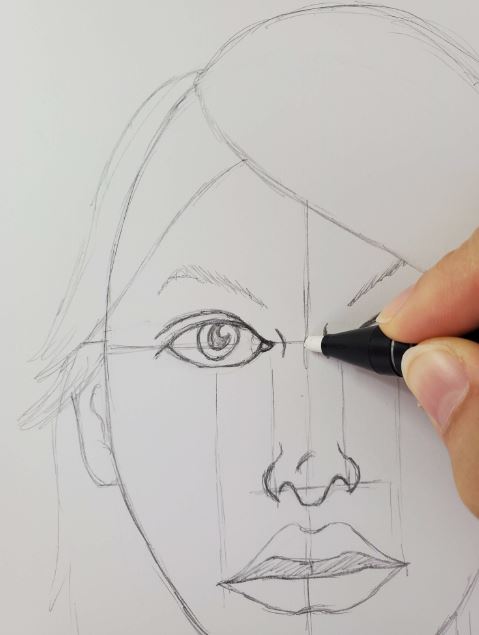
Using your guidelines for placement, draw the end of the olfactory organ. Draw three curved lines. One at the bottom, and one on each side for the nostrils.
Connect each side with lines that curve upward. Make a small indication for the top ball of the olfactory organ.
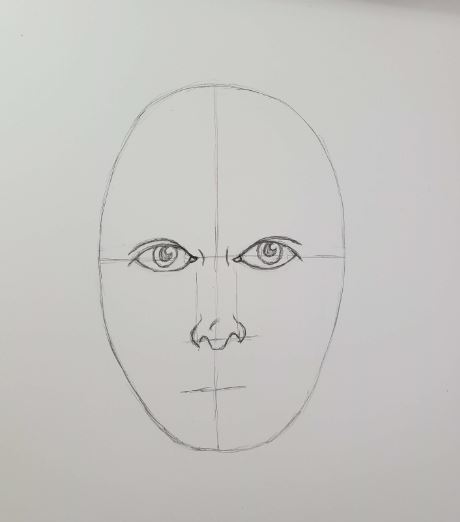
When y'all're reasonably happy with the nose, move onto drawing the mouth. Don't worry, at this point, virtually everything looking perfect. Y'all can fix things equally you go.
Drawing the Mouth
The width of your mouth should go from pupil to student. I drew lines to illustrate this point. Yous can add these lines if it helps, or just use the pupils as a reference bespeak.
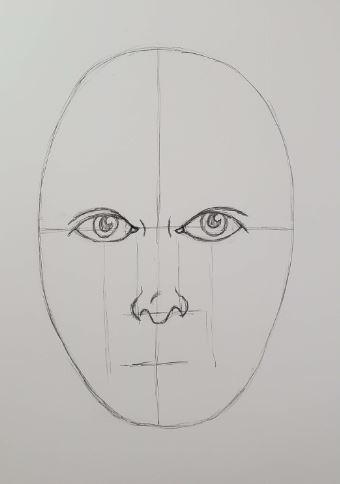
The way you draw your mouth with vary slightly from person to person. Women, for example, volition have bigger lips than men.
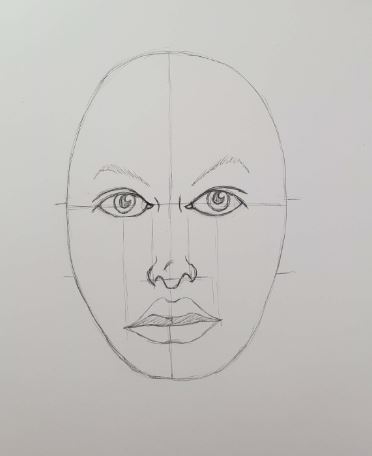
Start your mouth by drawing the expanse betwixt the lips. Depict the lesser of the upper lip. This line should not be perfectly directly.
If y'all're using a reference photo, look closely at the fashion this line curves.
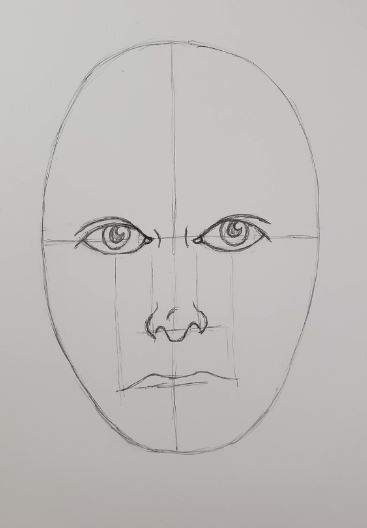
Next, draw the upper line of the lower lip. If the lips are pressed together, you'll only need 1 line for the area where the lips come across.
Now depict the lesser edge of the lower lip. Again, pay close attention to how information technology curves.

Finish the mouth by drawing the upper edge of the upper lip.

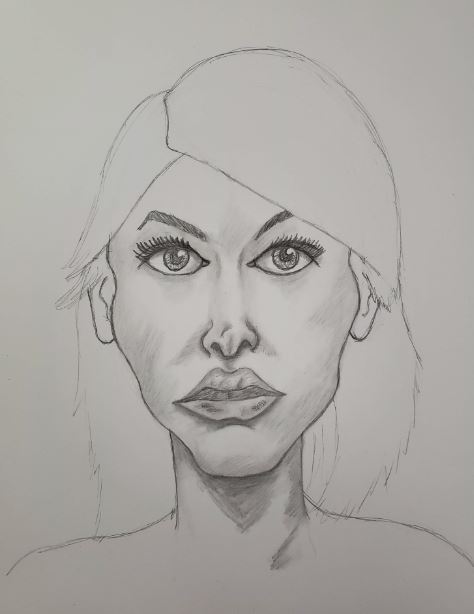
Drawing Eyebrows and Hair
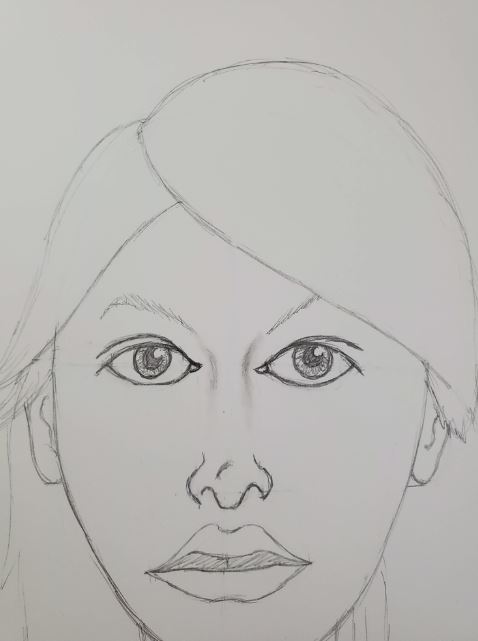
Draw in some rough indications of where your eyebrows will go. Get the shape and positioning down. Women will typically take much thinner eyebrows compared to men.
You tin as well run across here the indication of where the ears volition go. Ears should be positioned from the eyes to the nose.
And then beginning roughing in where the hair volition go. Now is a good fourth dimension to depict the cervix as well.
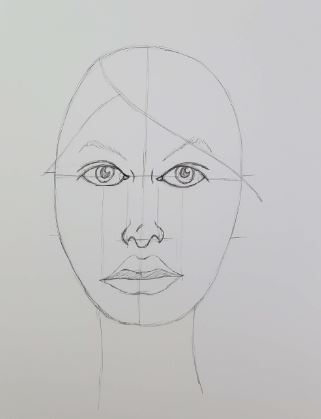
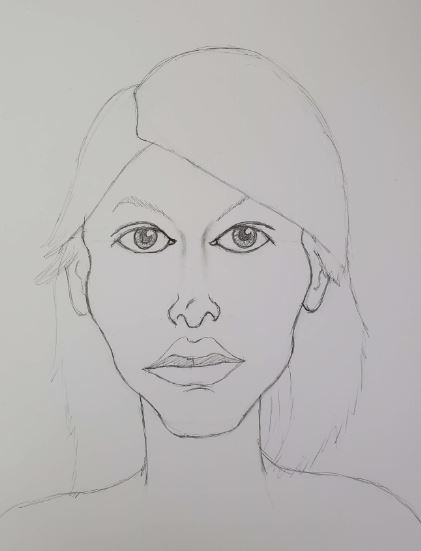
When you depict the top of the pilus, make certain you extend it across your initial head shape.

Continue cartoon the hair in whatever style your portrait drawing will take. This is a good time to depict the ears as well.
Use an eraser to outset cleaning up your cartoon and removing your original guidelines. A Factis click eraser works really well for this.
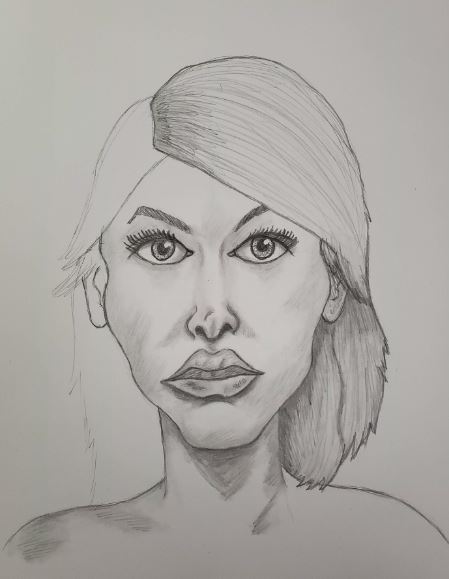
Shading Your Portrait
Start adding in some shading and refine your drawing. Some areas, like the bridge of the nose, look meliorate if you lot soften the lines with a blending stump. There are a couple of different styles, and many different sizes available.

Yous want to soften the areas where there really aren't indications of line, but rather an area of shadow. The bridge of the nose is a good example of this.
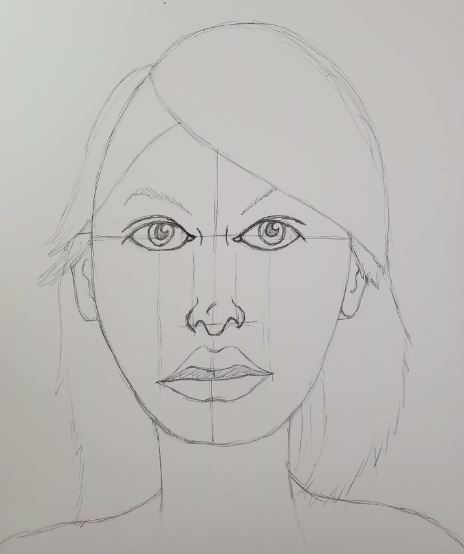
At this point you should start refining the shape of the face. Utilize your original oval shape as your guide, and add in some curves for the cheeks, and mentum.
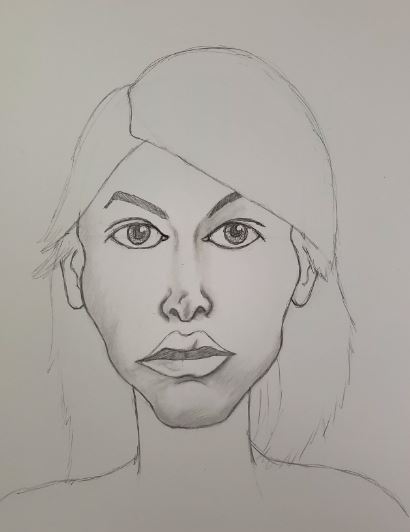
Draw in the rest of the eyebrows, and continue working on the shading.
If yous're drawing a female face be sure to add together in some eyelashes. They unremarkably wait better if you curve your lines as you're drawing them.
Continue to work on the shading, adding in darker areas as yous work your way effectually your face drawing.
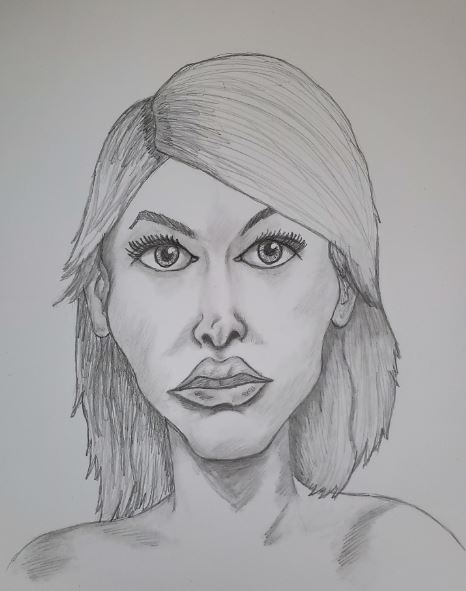
Cartoon Hair
For the hair, y'all want some private strands. But y'all don't want to try drawing the entire pilus that way. The easiest way I found to draw pilus is to add some lines where the darker areas are. So utilise a blending stump to fill up in the rest of the areas.
Add private strands sparingly.
The darkest areas of the hair volition exist around the face and cervix. And normally at the office of the hair every bit well.
Use a piece of fleck paper underneath your hand to avert smudging your drawing.
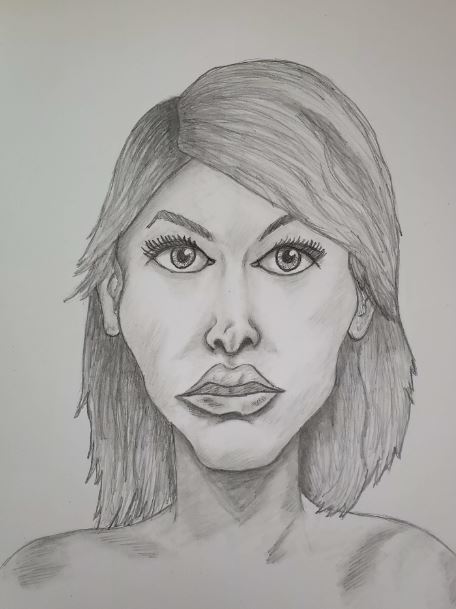
Continue working on your drawing, refining details and calculation shading, until you're happy with how it looks. And don't be agape to let your artistic style bear witness through.
As you tin can see in my finished face drawing, she has big centre and lips. And her face up shape is a bit exaggerated. This is because of my artistic manner, and about likely from years of drawing caricatures.
It wasn't my intention to depict her this way, but it just happened. And I'm okay with it because it represents me every bit an artist. You should be striving for the same thing. Develop your fashion, and above all else, enjoy the procedure. Art should exist fun!
Confront Drawings
I promise you lot enjoyed this step by step art lesson on how to depict a confront. Drawing anything takes practise and repetition. Drawing a face may take even more practice than other subjects take. Don't give up when you're feeling frustrated. Proceed going and you'll encounter improvements.
What are your biggest struggles with drawing and creating fine art? Allow us know in the comments.
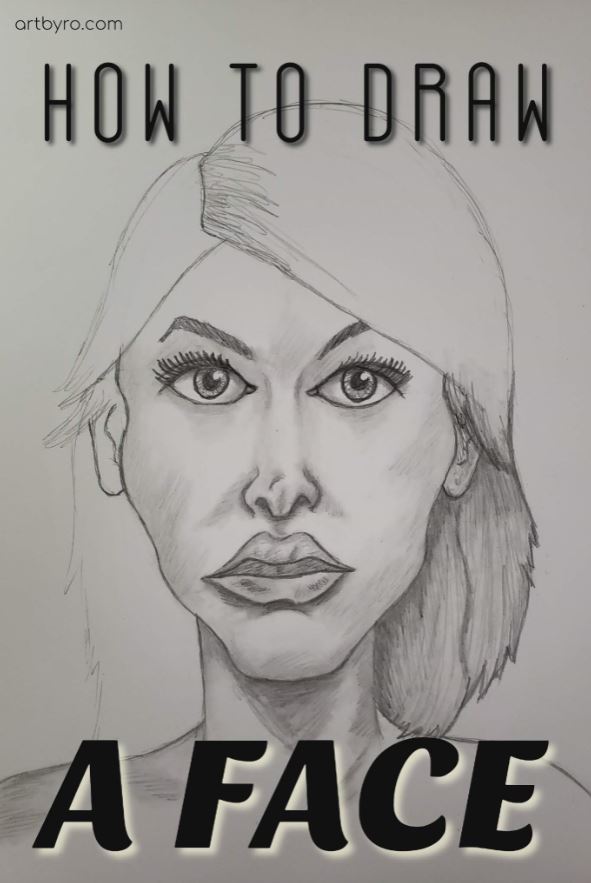
Pin it for Later on
Posts Related to Drawing a Face
Anime Eyes – Pace by Step
Drawing Eyes
Eye Drawing Challenge
Using Shapes to Draw

Roshanda is an fine art education blogger who is on a mission to coach and encourage as many aspiring artists as possible through the use of her blog. Learn more most her on the Virtually Me page and connect with her on Facebook, Twitter, and Instagram.

Source: https://artbyro.com/draw-a-face-easy/
Posted by: delacruzlinto1997.blogspot.com
0 Response to "How To Draw A Face With Pencil For Beginners"
Post a Comment